The TryNow Button
Background
The TryNow Button, also called the TryNow CTA Button (call-to-action), is the point where Shopper's are able to utilize Try Before You Buy by adding items to the cart. When clicked, the TryNow Button is responsible for adding the Shopper's selected product variant to their cart as Try Before You Buy.
Typically the TryNow button is added by dragging the TryNow Button App Block into your theme via the Shopify Theme Customizer. See the prerequisites for implementing the TryNow Button via App Blocks here.
Add to Cart Container Selection
The TryNow Button requires a reference to an add-to-cart (usually <form>) element in order to render and add the TryNow selling plan to products in the cart. The TryNow Button obtains this reference by looking for typical Shopify add-to-cart forms, but some themes require manual adjustment so that TryNow can learn where your add-to-cart form is.
Under the hood, the TryNow Button will place a new Selling Plan ID element within the add to cart container, which is serialized in the add to cart request. When a Shopper clicks the TryNow Button, the TryNow Button updates this element with the TryNow Selling Plan and then internally clicks the regular add-to-cart button.
Manually Specifying Add to Cart Selector
In most themes, specifying an add-to-cart form selector is not required. If you see the TryNow button rendering, the button has found a reference a container to bind to, and you do not need to specify anything here.
If no button is rendering when you add the TryNow Button App Block to your page, first ensure:
- You are previewing a product that has the TryNow Selling Plan applied to it's variants
- The Enable Try Before You Buy App Embed Block is toggled on
- Your theme is compatible with App Blocks and renders them.

After validating that the button is not rendering because of the element not being found, it is necessary to specify the selector manually by setting the value in the App Block settings. You can determine the element by using a tool like Google Chrome Elements Inspector to find the element and copy a reference to it. Be sure that this reference does not contain excessive dependencies on page structure or randomized IDs that are likely to change and break things later. Typically the selector needed is form[action="/cart/add"] .
Styling
Within the TryNow button app block, there are a number of settings that you can use to customize the styling of the TryNow button. Simply click on the app block to view and edit these settings.
| Setting Name | Setting Description |
|---|---|
| Title | Adjust the copy that you would like displayed on the button. |
| Custom CSS | While the TryNow button will attempt to match styles automatically, use this CSS fields to add any custom CSS. |
| Button classes | Add any new class names to the TryNow CTA button. |
| Button margin | Add any margin above, below, or on either side of the button. |
| Description | Adjust the copy displayed underneath the button. |
| Description text size | Adjust the font size of the description underneath the button. |
| View collection text | If you include a link to your TryNow collection page beneath the button, use this field to adjust the text that is hyperlinked (e.g. "See all the items you can try.") |
| Collection URL | Select the collection page you would like to be linked underneath the button. |
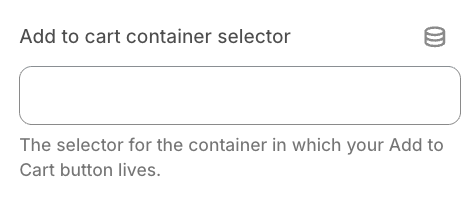
| Add to cart container selector | The selector for the container in which your Add to Cart button lives. |
| Gated toggle font size | Adjust the font size of the toggle text switching between Try Before You Buy and Add to Cart. |
| Gated toggle size | Adjust the actual size of the toggle icon. |
| Logo color | If you have a black or dark background, you may need to adjust the logo color to be white instead of the default black. |
| Logo vertical alignment | Adjust the vertical alignment of the TryNow logo below the CTA button. |
| Logo horizontal alignment | Adjust the horizontal alignment of the TryNow logo below the CTA button. |
| Logo width | Adjust the size of the TryNow logo. |
| Autoposition | This will be by default toggled on. This setting auto-positions the TryNow button directly below the ATC button. |
Testing
Test that the TryNow Button is working by finding the TryNow Selling Plan ID inside the <head> of a TryNow product detail page source code. This ID is contained inside a <meta> called trynow:selling_plan_id.
<meta name="trynow:selling_plan_id" content="123456789">When an item is added to the cart, you should be able to locate the matching selling plan ID on the Shopify add.js request.
// Good add-to-cart request payload including the TryNow Selling Plan ID
{
  items: [
    {
      quantity: 1,
      id: 794864229,
      selling_plan: 123456789,
    },
  ];
}
You can also GET the contents of /cart.js to assert that the product was added as TryNow.
Common problems and causes:
- If you're seeing the correct selling plan on the
POSTrequest, but not returned in the response or inGETrequests to/cart.js, you are likely encountering an eligibility issue with TryNow and/or Shopify Selling Plans. - If clicking the TryNow button does not submit an add-to-cart request, the TryNow button is binding incorrectly to the add-to-cart form.
Elements of the Button
The <trynow-cta-button> element is a group of elements, each of which provides a unique ID for customization. Below is the basic structure of the CTA button.
<trynow-cta-button>
  <button id="trynow-cta-button" type="button"></button>
  <span id="trynow-cta-description">
    <span id="trynow-cta-learn-more">Learn More</span>
    <a href="https://www.trynow.com/shopper" target="_blank"> </a>
  </span>
</trynow-cta-button>
<trynow-cta-button>
  <button id="trynow-cta-button" type="button"></button>
  <span id="trynow-cta-description">
    <span id="trynow-cta-learn-more">Learn More</span>
    <a href="https://www.trynow.com/shopper" target="_blank"> </a>
  </span>
</trynow-cta-button>
Updated 3 months ago